# Installation
IMPORTANT
We strongly recommend that you perform a backup before importing UniWebView to your project. If you are using any version control system (opens new window) (like Git or SVN), it should be definitely safe to continue.
# Unity Asset Store
If you purchased UniWebView from Unity Asset Store (opens new window), open the Asset Store window from Window → Asset Store or Window → Package Manager. You could find UniWebView 4 there under My Assets, then click "Import".
# UniWebView Store
Besides of Unity Asset Store, we also have our own store (opens new window). After purchasing from our store, you could download the uniwebview_x_y_z.unitypackage (x_y_z in the file name indicates the package version). Open your project in which you want to use UniWebView, then double-click the downloaded file to import it.
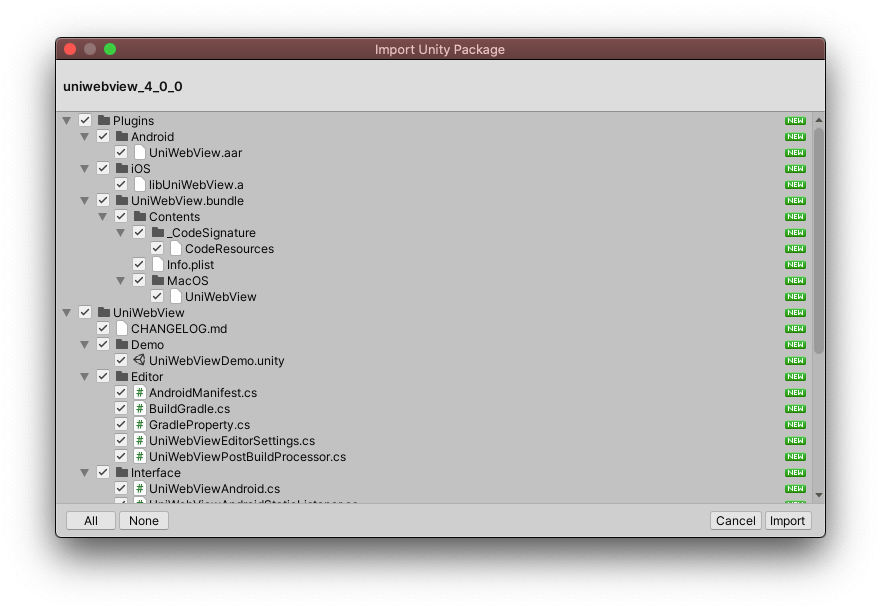
# Importing Package
Unity will prompt you with a window to confirm the importing files. Just click "Import" to add all files to your project.
The minimum deploy target of UniWebView is from iOS 9.0 and Android 5.0 (API Level 21). If you are still using an older deploy target for you Unity project, you may have some issues when exporting the project to the final product. Please make sure to update the Target minimum iOS Version and Minimum API Level in the player settings.
# Optional Steps
GRADLE
UniWebView uses Gradle (opens new window) to set up necessary dependencies on Android. There was a deprecated "Internal" build system until Unity 2019.3, and that might be what is used in your project. To use UniWebView in such projects, you need to switch to the new Gradle build system first.
From Unity 2019.3, the "Internal" is not an option in Unity anymore.
After importing UniWebView, you can open the Unity Preferences panel (Unity → Preferences) to configure some necessary permissions. In most cases, there is no need to adjust them and your project should build and run well. This panel provides a quick way to customize how UniWebView should adjust some behaviors or dependencies installation.
UniWebView uses a post-build script to modify the gradle project and "AndroidManifest.xml" file for the exported Android project.
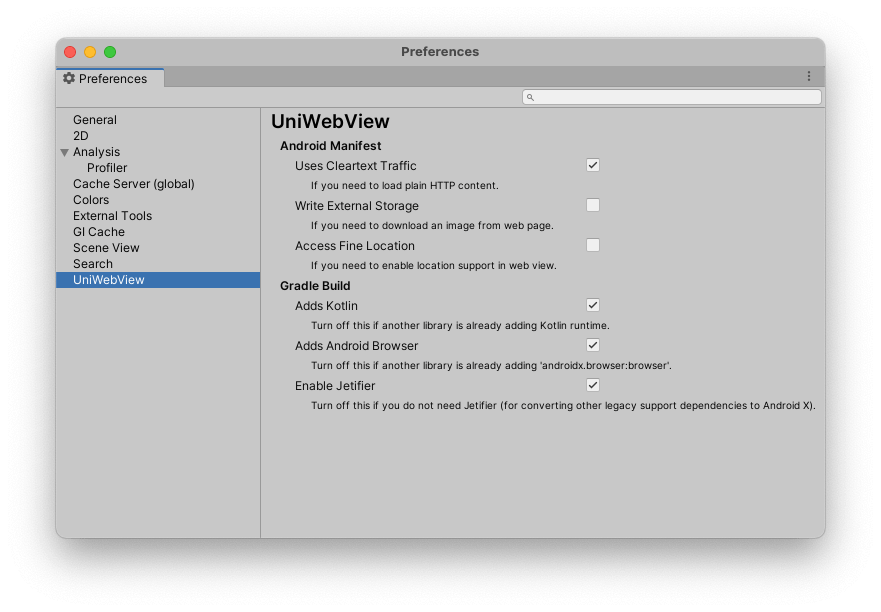
# Android Manifest
Settings in this section will be used to adjust the final AndroidManifest.xml file of the exported project.
# Uses Cleartext Traffic
Set usesCleartextTraffic flag to true in the "AndroidManifest.xml". From Android 9.0, all plain HTTP traffic is forbidden by default. If you need to display these content in the web view, turn it on.
# Write External Storage
Add WRITE_EXTERNAL_STORAGE permission to the "AndroidManifest.xml". It enables storing an image from the web page to the Download folder on the device.
# Access Fine Location
Add ACCESS_FINE_LOCATION permission to the "AndroidManifest.xml". It enables the web view to use the location information. To get the location actually, you also need to call LocationService.Start (opens new window) before you open a web page.
# Gradle Build
You can use settings in this section to modify the build.gradle behavior when exporting the project. By default, UniWebView
will add all dependencies it needs. However, if you are using another package manager or some embedded libraries, a duplication might
happen when exporting to Android APK file. In this case, you can try to disable a certain option below to let UniWebView use the existing package instead.
# Adds Kotlin
Whether Kotlin runtime should be added to the project. UniWebView for Android is written in Kotlin and you need the runtime in your project to run the code. It is on by default. If any other packages of your project is already adding this, you can opt-out this option to skip adding Kotlin to the project.
# Adds Android Browser
Whether the androidx.browser package (opens new window) should be added to the project. UniWebView uses some features in that package. It is on by default. If any other packages of your project is already adding this, you can opt-out this option to skip adding the browser package to the project.
# Enable Jetifier
Jetifier (opens new window) migrates your support-library-dependent libraries to compatible with AndroidX.
UniWebView requires androidx.browser package, which is only available as an AndroidX package, so keeping using AndroidX support libraries (if there are)
makes your project cleaner. However, this is optional and if you have to use a legacy support library, disable this setting.
# Restarting Unity
Restart the Unity app to give it a chance to load the UniWebView bundle for macOS Editor support. Remember to switch your build target in Player Setting to either iOS or Android, since UniWebView only works on these two platforms. Otherwise, UniWebView gives a warning, saying the platform is not supported yet.
# Next Step
Congratulations! You are prepared to use UniWebView in your project now. Please read next chapter to know how to use the simplest prefab way to show a web page.